Friday, July 17, 2015

Short Review Friday Anchor Studs

Hello everyone!

Welcome to Short Review Friday part 2! Yay! I'm actually kinda late on posting this (almost saturday) :/ oops but I wanted to keep the tradition going! I was recently sent some awesome nail art goodies by BornPrettyStore! I have been shopping from there for quite a while now so I was very excited when they contacted me.

This week I will be reviewing these amazing Anchor Nail Studs that I recieved from BornPrettyStore. Of course, as always, I will have direct links to everything I used for this mani. You can also receive 10% off BornPrettyStore using my code 'RAK31'

I really loved these studs! I am NOT good at doing freehand nail art. I cannot draw. Last time I tried to write an anchor I failed. These are a super easy and fast way to make your mani look like you actually tried haha

The down fall was that they peeled off super quick. I think it might've been because it got caught in my hair then I peeled if off my nail because it was lifting. I would highly recommend a 2nd topcoat layer. 

Overall, the anchors are a great size. I had no trouble applying them on my nail and they aren't thick either! I don't think the anchors are reusable but they come in a pack of 50! 


More about the Anchor Studs:

  • These are sold at BornPrettyStore.com 
  • They come in a pack of 50Pcs for $3.19
  • They come in gold or silver

More about the mani:

  • I purchased the Chevron Vinyls from nailvinyls.com 
  • The blue nail polish is from Pahlish 'Sailing the Hispaniola'  (no longer sold)
  • The gold  on my pinky is Fun Lacquer 'King'


Let me know what you think about my Short Review Friday pt. 2! and also what you think about my manicure. Don't forget to use my code for 10% off your next purchase at BornPrettyStore they have a lot of awesome nail art stuff!


Until next time,

Karen (minipolishh)

Friday, July 10, 2015

Short Review Friday Shell Studs

Hello everyone!

I am back with another blog post! I was recently sent some awesome nail art goodies by BornPrettyStore! I have been shopping from there for quite a while now so I was very excited when they contacted me.

I thought I would share a short review every friday of a new product I am trying out. I personally like short reviews. When I read a review I want to know if the product is good or not. I don't want to read a million things about it. That's just my personal preference unless it's something that i'm really interested in. This week I will be reviewing these amazing Shell Nail Studs that I recieved from BornPrettyStore. Of course, as always, I will have direct links to everything I used for this mani. You can also receive 10% off BornPrettyStore using my code 'RAK31'

Now for the quick review. I loved them! They are not too overwhelming on the nail. I put topcoat over the shells and it did not mess up my manicure (aside from using an old topcoat...THAT messed up my mani haha). I normally don't like to purchase studs because i'm always scared of losing them. I had this mani on for 3 days before removing it and the studs were still holding strong! The stud also fits perfectly on my thin nail bed. Sometimes with studs they either stick out or don't lay flat on my nails but these did! These shells also add a little more to your mani without having to put a lot of effort.


More info on the studs:
  • These Shell Nail Studs come in a pack of 10. One for each nail if that's what you like. 
  • They cost $2.28 USD for a pack of 10 studs (BornPrettyStore has free shipping worldwide!)
  • You have the option between Gold or Silver 

After removing them off my nail I was a bit sad to let them go. I want them to at least last me another mani or so. I cleaned them up a bit with some acetone and a clean up brush.  You can still see some blue on the shells but they still look gold to me! In my opinion they are totally reusable if you take good care of them :D


More info on the manicure:

  • I used Cirque Colors: Julep, Cabana Capri & Monte Carlo (no longer for sale)
  • For my pointer and middle finger I used Monte Carlo
  • For the mermaid scales I sponged on Julep and Cabana Capri
  • The mermaid scales were purchased from Vinyl Boutique
  • Lastly, the Shell Nail Studs are from BornprettyStore 


Let me know what you think about my Short Review Friday and also what you think about my manicure. Don't forget to use my code for 10% off your next purchase at BornPrettyStore they have a lot of awesome nail art stuff! 

Until next time,

Karen (minipolishh)


Tuesday, July 7, 2015

Formula X Infinite Ombre Review

Hello everyone,

I'm currently out of town so I figured I would write as many blogposts as I can. Formula X is also giving you a chance to win this amazing kit! Link at the end of this blog post! 

Today I will be reviewing the Formula X Infinite Ombre kit. I received these products from Sephora X as part of the Preen.Me VIP program. The kits retail value is 29.50.  Here is a look at what the kit looks like. Since i'm out of town I don't have pictures of the kit so I took most of the information of off the Sephora website :) 

Picture Taken from Sephora Website 

Here is some additional information about the kit that I got off of the Sephora Website.


What it is:
A revolutionary five-polish nail design set that makes stunning ombré nail art possible with a simple stroke of the brush—no tools required. 

What it does:
Pull off ombré nail looks with this innovative set that makes nail art easy. It features a kaleidoscopic array of five lacquers, uniquely designed to fuse with one another while wet, allowing you to blend, stripe, dot, and marble your way to never-before-seen nail art in a few effortless brush strokes. Simply layer the colored lacquers over the Platinum Prime silver base once dry and watch your mani transform instantly into any effect of your choice—from ombré to tie-dye to water color effects—the design possibilities are infinite. This set includes an illustrated, step-by-step tutorial for three eye-catching looks so you can paint on eye-catching color hybrids that revamp nails into stunning works of art. 

This set contains: 
- 4 x 0.13 oz Effects Nail Color in Boundless Berry (electric pink), Infinite Indigo (vivid bluish-purple), Timeless Teal (dynamic blue-green), Limitless Lemon (radiant yellow) 
- 0.4 oz Effects Nail Color in Platinum Prime (silver anchor base) 
- Step-by-step tutorial 


I enjoyed playing around with this kit! There are seriously an infinite amount of manis you can do with this kit. Of course, it does take a couple of tries. As you can see, not one mani was exactly the same (except the first two). They watermarble so well! The colors spread out amazingly when they touch water. If you're a huge watermarble fan than you'll definitely love these. I also tried my luck using some fan brush nail art and I love it! They worked so well together!

Aside from using the Infinite Ombre Kit for all these manis, I also used the Formula X Shine Top Coat. I've bought this topcoat waaaay before I was sent the kit so I figured, why not combine them. I also used some nail art brushes and dotting tools on almost every mani. You can find the exact kit I used at Born Pretty Store <---Direct Link (10% off using my code 'RAK31') 

Here are all the manis I was able to create with just this kit!


Overall, I really enjoyed this kit more than I thought I would. There really are an infinite amount of ways to do your mani. The kit may seem a bit pricey but you do get a lot out of it. I hope Formula X comes out with a lot more colors to play around with! I would like to see maybe some pink and green. 

Lastly, don't forget to follow @formulax and @preendotme on instagram for a chance to win a kit for yourself! 

Enter here as well:
http://formulax.com/infiniteombresweeps

Will you be purchasing one?
What colors would you have liked this kit to come with?


Until next time,

Karen (Minipolish)

Wednesday, June 24, 2015

JoliePolish Stamping Polish

Hello everyone!

Lately I've been playing around with my stamping plates and nail polishes. To be honest, I suck. I suck at stamping. The nail polish never picks up on my stamper or when it does, it never transfers onto my nail.

I've been a fan of Bory's shop aka Joliepolish for quite a while (she's known for her awesome clean up brushes), as soon as I saw her talking about coming out with stamping polishes I knew I had to try them out!  Today, I will be reviewing the stamping polishes I purchased from her shop and offering some tips that I have found useful when it comes to stamping.

Item description: The set includes 8 polishes. Bory made a full set and a mini set. I always like to purchase mini sets (if available) it gives me the chance to try out the product and also save a bit of money. The full size set retails for $48 and the mini size set retails for $28. If you're new to stamping like I somewhat am, I suggest you purchase one of her stamping kits, they are amazing! She also ships extremely fast!


A long time ago I had this crazy idea of purchasing a bunch of stamping plates in hopes that I would become really good at stamping haha! I purchased a set of stamping plates from Pueen which i've had stashed in my drawers for maybe 2 years. I decided to use 2 plates from that set. The set is from the 2013 Nail Art Collection.


Look at that really noticeable scratch on the stamping plate ^^^ That was done using the scraper my original stamping kit came with (not bought from Jolie Polish). 

The scraper (not the stamper) looked like this one ^^ (picture taken from google..oops)

You can somewhat see the metal on that scraper. This is not good!

Tip: Instead of using this scraper, replace it with a credit card that you no longer use, a business card works great too, or a plastic scraper that some stamping kits come with. As long as it's plastic and not metal, you'll be good.


For this stamping plate I used a business card I had laying around the house and there is no visible damage on my stamping plate! Yay!


Now for the fun part (I hope). 

I originally had bought the stamping kit when I bought my stamping plates and no matter what I did they wouldn't stamp! ugh, so frustrating. So after contemplating for a really long time on whether or not to purchase another stamping kit, I decided to go ahead and purchase another one. I have bad luck with them because that one didn't work..after purchasing 5, yes! FIVE! different stamping kits I decided stamping wasn't for me. Clearly i'm crazy for even purchasing 5 to begin with haha. 

Then this little stamping fairy comes along (Bory) and starts posting on instagram (@joliepolish) about her stamping kits and how she preps them for you before she sends them out to you (talk about amazing customer service/satisfaction). I already had way too many stamping kits so I decided to just purchase the replacement head for my original stamper. (picture shown below). 

As you can tell, my stamper handle (black part) is all used up. The yellow stamper is the replacement head I purchased from Bory's shop ( https://www.etsy.com/shop/joliepolish). 


Here are some images using the stamper I bought from her shop along with the stamping polishes she sells. Both the stamper and the stamping polishes work AMAZING! The polishes are opaque and have this amazing shimmer to them. They truly stand out. 


This last picture using the yellow stamper didn't pick up the polish very well.

Tip: Buy some Mr. Clean erasers and lightly rub your stamper head 
This will help pick up images a lot easier

Also don't forget to clean your plate and scraper after 2-3 uses! 
Clean your stamper by using a lint roller or some tape :)


Because i'm such a stamping kit fanatic I have also been seeing a lot of stamping kits with smaller handles. I decided to purchase another stamper but from Winstonia. I really like the handle on this stamper. If you have small hands like I do it's so much easier to grip. 

Below are pictures showing the stamper using the stamping polishes. 


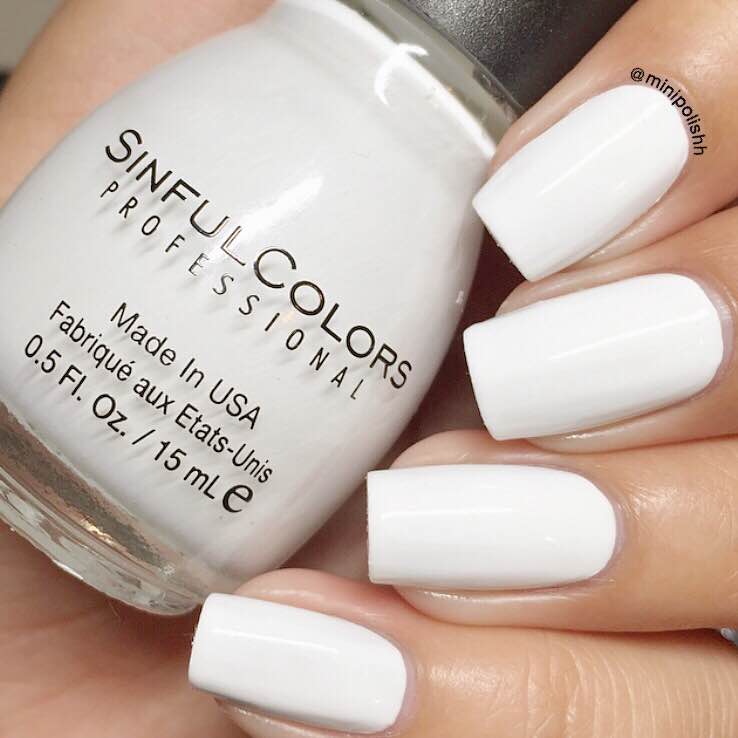
Now for the manicures I did! For the first manicure I just did a stamped gradient, because those are so much fun! I started off with a white base, this is Sinful Colors 'Snow Me White'.


The polishes transferred beautifully onto the stamper! They even made such a great gradient!


Here is a macro of my favorite nail using 3 of the stamping polishes from Jolie Polish. 

This mani was just a tester mani, I wanted to stamp using all the polishes just for fun but I really ended up liking how it turned out. 


Aside from stamping, these polishes are really good for gradients. I actually covered the mani shown above because I was too lazy to redo my nails. I only needed to sponge over the nails ONCE and you can't even see the mani underneath it! wooooow! That's how opaque these polishes are! After sponging on the gradient, it didn't take long for them to dry so I just stamped some flowers over them without a problem! 


After messing around with the polishes practically all night, I needed something quick to wear so I could go to sleep. I used one of Joliepolish stamping polishes on my pointer and pinky. Only ONE coat was needed. How amazing is that? I also couldn't go without stamping my other two nails. 

If you're in a rush to go to sleep or to get out the door, these polishes are great even for a simple mani. 


Overall, I am really loving stamping thanks to these polishes and the stamper replacement head I purchased! I'm obsessed! I even want to purchase more replacement heads for all my other horrible kits (not purchased from JoliePolish). Bory is also coming out with other amazing colors to stamp with. Believe me, I will probably be purchasing them very soon. If you aren't a fan of multiple bright colors and want to stick to the basics, Bory also has other colors such as, black, silver, and gold.  

If you're like me, someone who is tired of purchasing very bad stampers go check out joliepolish! She has everything you need, stamping kits, stamping polishes, stamping plates, and most importantly, clean up brushes. Make sure you follow her on instagram @joliepolish her inventory goes by extremely fast so you don't want to miss out on these! 

Let me know what you think.
Have you heard of Joliepolish before?


Until next time,

Karen (minipolishh)


Tuesday, June 2, 2015

James Allen Mini Nail Engagement Rings Review

Hello everyone!

Today I will be writing a (hopefully short) review of the limited edition James Allen Mini Nail Engagement Rings, perfect for wedding season! I received these rings through the PreenMeVIP program. My review is 100% honest :) 


Here's a quick description of the rings: James Allen designers have created seven limited edition Nail Jewels- finely crafted mini engagement rings for the nails that combine a genuine fine diamond with a 14k white gold band.


The kit I received included: Two finely crafted mini engagement rings for the nails. They came in this two bright red boxes (i'm assuming the same ones real engagement rings come in). In addition, the box came with a cloth and glue for the ring. 


Here are the macros I took of the two nail (charm) rings I received. 
The first one is definitely my favorite! Very classy!


The second one seems more like a princess ring. I kept thinking of this ring that will go perfect with pink nails (My idea of princess haha). 


I've actually reaaaalllly enjoyed playing with these! They have been so much fun! Although I have never been engaged, I could only imagine what type of nails I would like to have whenever I do get engaged. These are pictures of all the manis I have created using these 2 beautiful nail rings/charms. My nail beds are very thin so applying them in a horizontal form was the best way to get a better look. I have seem these on other ladies and they look amazing even on short nails. Look up the the hashtag #JamesAllenRings to see other recreations using these nail rings. 

I actually liked having my nails with a charm/ring. I must say that I did not use the glue the box came with. Since I was scared to lose the ring I didn't want to wear it out and I was not sure how good or bad the glue was. Maybe once I'm done playing with them I will wear them with the glue to see how long they can last on my nails. 

Overall, I really like these nail rings! They are very easy to apply on the nail. They are made perfectly! They are also very light on the nail. You won't feel it weigh down your finger (haha). I would have likes to see different sizes for different nail shapes. That would've been cool and probably made it better for those who have longer or short nails. 

 I don't think they are on sale to the public yet but hopefully they release them to the public soon so others can have fun with them! Especially you ladies who are engaged.

If you visit the Jame Allen website you can browse through their engagement rings and all I can say is wow! They are all beautiful! Can I have them all please?  

Here are all the manis I have done so far. Most of the nail polishes I used are on my IG: Minipolishh :)


So there you have it. What do you think about them? If it retails at a decent price will you be purchasing these? They seriously shine no matter what mani you wear them with.


Until next time,

Karen (minipolishh)