This may be a little bit long...so...enjoy!
Ever since I started this blog every time I purchase something I try my best to write a review about it or to write a blog about it that way I can keep this trend going. I know when I want to purchase something I make sure I do my research so I look at other instagram accounts and other blogs and hopefully reading my blogs can make you decide whether or not a product is worth it.
Disclaimer: These were not sent to me by Glisten and Glow, I am reviewing them for fun.
Warning: Do NOT purchase if you are allergic to latex!
Today I will be showing you the new Protect and Replenish Duo by Glisten and Glow. From what I know, this duo is not sold individually. The duo comes with a latex barrier called, CTRL-ALT-DEL, this latex barrier comes in a bright pink color. In addition, CTRL-ALT-DEL is a moisturizing latex barrier with a Sangria White Peach scent. Along with the latex barrier the duo comes with a cuticle oil with a matching Sangria White Peach scent. The retail value of this duo is $15, you can purchase this through Glisten & Glow's shop. Both come in a 15ml sized bottle, which is a really good price seeing as some latex barriers come in smaller bottles for a much higher price.
From what I've seen, latex barriers are becoming very popular and also very helpful for those who love to do watermarble, gradients, anything that can get on your cuticles and sides of your nails. On the plus side latex barriers help clean up the mess faster than using acetone.
Today I will be showing you a gradient I did using the latex barrier around my nails to help me do a fast clean up and to save time. I will also provide direct links for everything, all of the China Glaze polishes were purchased though HBBEAUTYBAR :)
For this mani I used:
- The Protect and Replenish Duo and Fast Drying Top Coat by Glisten and Glow
- Not pictured is the Cirque Colors Base Coat I used.
- Also not pictured is a makeup sponge I used for the gradient.

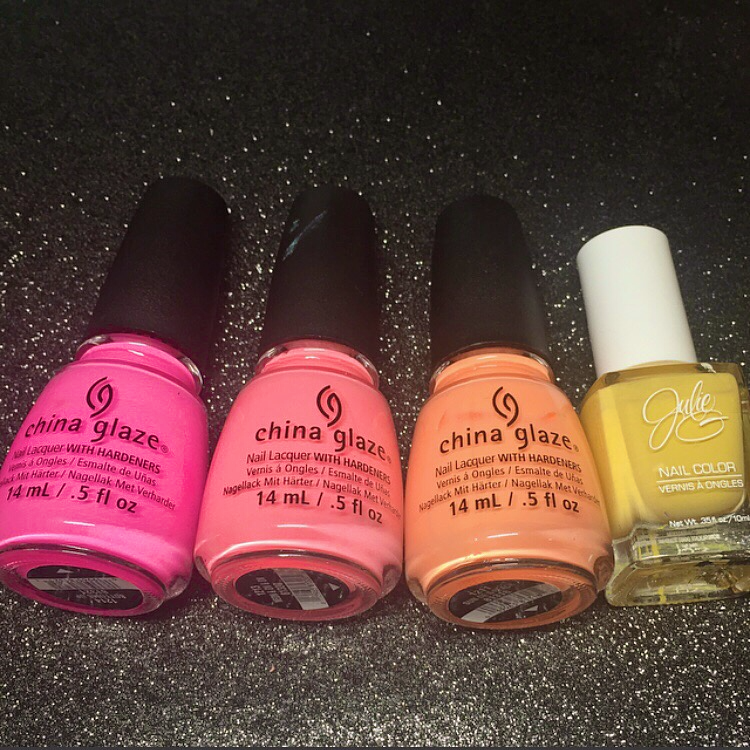
From left to right, China Glaze Bottoms Up, China Glaze Neon and On and On, China Glaze Sun of a Peach, and Julie G Canary Islands
First thing I did was apply two coats of white nail polish as my base. I found that a white base makes it easier for me to do gradients, it also reduces the amount of times I have to sponge the polish onto my nails.
While I waited for the 2 white coats to dry, I applied CTRL-ALT-DEL around all my nails. The drying time was very fast. By the time I had finished all 5 nails, I didn't have to worry about waiting for the latex barrier to dry. Before starting my gradient, I soaked my makeup sponge in some water then squeezed out the excess water. I found that a damp makeup sponge prevents the nail polish from drying too quickly.

As you can see, most of the polish got on the latex barrier.

Once I was done and content with my gradient, I removed the latex barrier with tweezers that I purchased at my local nail art supply store.
The little curly pinky and yellow strips next to the latex barrier are the strips I removed from my nails. They were easy to remove and also came off in one whole piece.

This is the aftermath of what was left once i removed the latex barrier. It really wasn't so bad. I thought it would be a pain in the butt to remove the little pieces that were left over but it actually wasn't bad! I was able to remove the leftover pieces with a bit of acetone without a problem. The downfall about this latex barrier is that for some odd reason it smells a bit weird..I get an unpleasant scent from it, this might just be my batch though (not sure).

After clean up I decided to apply some of the cuticle oil the duo came with. Acetone is VERY drying for my skin. I always have to end up washing my hands then putting a lot of lotion as soon as I'm done with a mani. What I like about this cuticle oil is that it smells amazing and the application is super easy.

I was a bit unhappy with how the gradient came out. I wasn't very sure about it. I knew I originally wanted to do some nailart with it but wasn't too sure about what to do. I recently purchased a new stamper so I decided to stamp some feathers on it but it didn't turn out the way I envisioned it. I also messed up one nail so I had to improvise by adding some gold to it.

I wasn't very satisfied with this mani, I think I messed it up a bit so I decided to add another mani to this blog.
For this this mani I used:
- Cirque Colors Virgo (purple)
- Cirque Colors Sunset Park (Coral)
- I also used Glisten & Glow CTRL-ALT-DEL
- TwinkledT Triangle Swirl Vinyls

Here is a picture of how I layered the two polishes to make the colors blend. Applying these nail vinyls was actually very tricky so this is the best I could do.

After applying the nail vinyls I sponged on the colors until all of the white was no longer visible. It is very important to remove the vinyls as soon as you're done with the last layer. This helps prevent the polish from getting stringy and messing up your mani as you remove the vinyls.

After removing the nail vinyls and the latex barrier I did some minimal clean up and this is the finished product. I definitely like this one a lot more.

Overall, this was my first time trying out a latex barrier and I am very pleased with it. I liked that I did not have to spend a lot of time cleaning up the nail polish around my nails and cuticles. I also liked that I was able to remove it without a problem and that I did not have to wait long for it to dry. Seriously, by the time I was done applying the latex barrier on my nails, it was all dry. Also, do NOT put your nails close to each other when you apply the latex barrier, you fingers will get stuck to each other if you do. If you are looking to purchase a latex barrier any time soon I recommend you look into this one. 15 dollars for a cuticle oil and a latex barrier is totally a great deal (in my opinion)! Especially for the size of these 2 products. So far I have done at least 3-4 manis and the bottle seems to still be full! You really don't need to apply a lot of product, a little really does go a long way.
Hope this blog was a bit informative and that it helped you decide whether or not this product is worth the purchase.
Thank you for reading! Until next time,
Karen (minipolishh)
No comments:
Post a Comment